If it seems like it’s been a while since I last posted . . . it has. Despite the dry summer, the mushrooms are coming out now, so most days we’re out scouting our favourite spots.
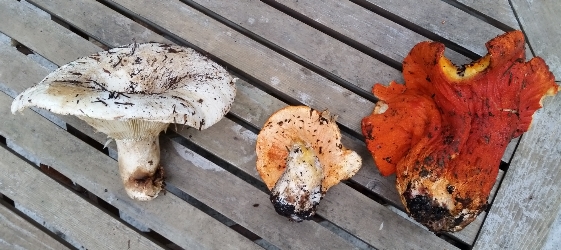
We discovered one particular patch of Lobsters (Hypomyces lactifluorum) two years ago and hadn’t been back since, but we decided to check it out this morning. Strangely enough, there were very few other mushrooms around, but our patch didn’t disappoint; we came home with a good ten pounds of the beauties, most of them already breaking apart. But that doesn’t matter to me—I’ll strip the coloured bits no matter how fragile or smelly their hosts might be.
And it was interesting to see the various stages of progression: from an uninfected Russula brevipes to one starting to show a bit of colour, to one in the full stages of orange.
My evening work is cut out for me—paring mushrooms! Now we’re certain to have a strong Lobster dyepot for next year’s Fungi & Fibre Symposium. (Have you marked your calendars yet? October 17-22, 2016, Madeira Park, BC.)
Like the rest of North America’s West Coast, we’ve had an exceptionally dry spring and early summer. Flowers, birds, berries—they’ve all been a few weeks early this year, and everything is scarily dry.
I’ve been away for three weeks and on my return was hesitant to go out into my Back 40, knowing the moss would be crunchy and the ground dry. But I needed my forest therapy (after a glorious but noisy and crowded holiday in Sicily), so out I went with Rica, my fantastic flying puppy.
And what should I find, in a spot where I’ve never found this mushroom before:
Tapinella atrotomentosa – first of the yearVelvet Pax – drying already
(I did find a few of these Velvet Pax at this time last year, but we’d had a cool, rainy June. I certainly didn’t expect to find it in our current conditions. Usually they appear in late July through September.)
This was on its own in open sun (growing out of wood under the moss), already getting parched. Down the hill, at the base of a shady stump where I’ve found these mushrooms in previous years, was another clump that still looked as if they had some growing to do, so I’ll keep an eye on them for now. My other usual spots haven’t revealed anything yet.
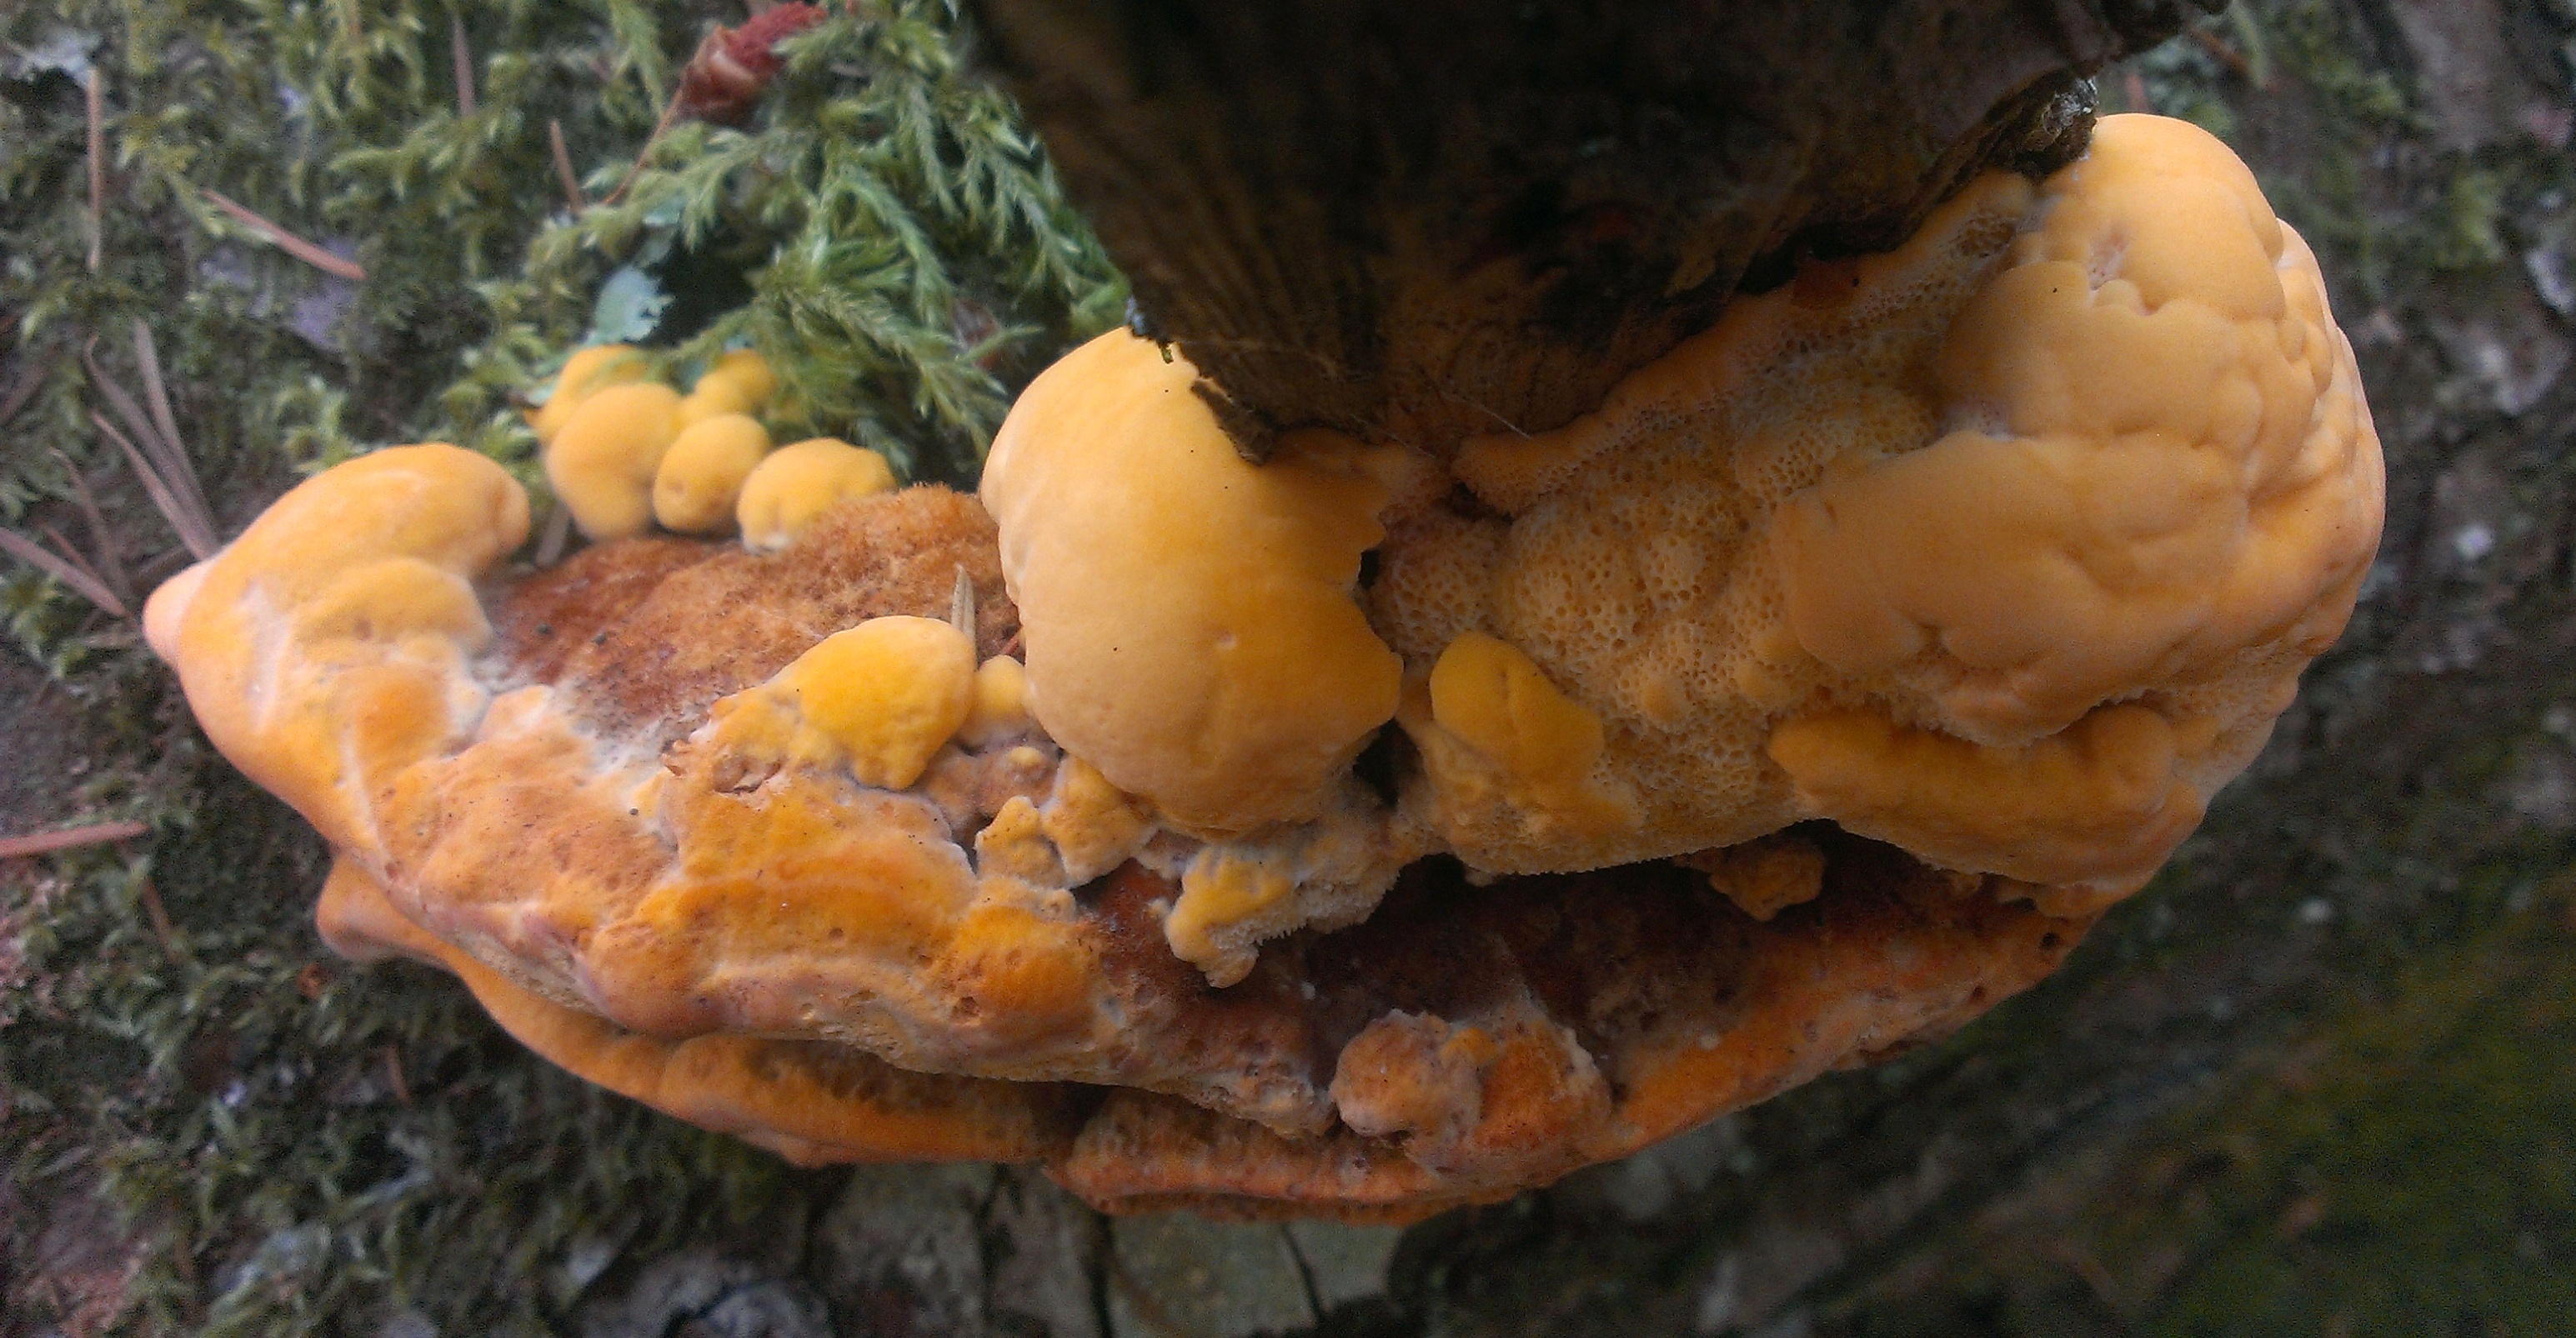
Along the trail, farther along, is my nurse log for Pycnoporellus fulgens. Even though I don’t get a striking colour from these, and I usually need two years’ worth of collecting to make one dyepot, I’m always happy to see them, as they are (usually) the first harbingers of mushroom season.
Pycnoporellus fulgens
Pycnoporellus from above
I’ve never seen this fungus in such a huge cluster before—this one is about four inches wide. Usually it appears as a single fan, perhaps in tiers (see my post from 2009 when I first realized what it was). As always, I’ll leave this to dry over the summer and start a new stash until I have enough for another pastel dyepot.
My dear friend and wonderfully creative fibre artist behind the Ruby Slippers blog has made some beautiful fabric pieces by eco-dyeing—rolling flowers and leaves into little bundles, then steaming them. She has to leave these bundles alone for several weeks to ensure that the colours are imprinted, and when she can finally open them, the results are marvelous.
Eco-dyeing with mushrooms presents its own challenges, but when I noticed a layer of “dust” in the bottom of a box holding a bunch of dried Dyer’s Polypore (Phaeolus schweinitzii), a tiny light bulb sparked an idea. I dyed some silk scarves in a Phaeolus dyepot and removed them before the colour became too intense. Then I put them immediately into a pot of simmering water—a stop bath—to set the colour. Then I got to play, and here’s what happened.
Phaeolus dust
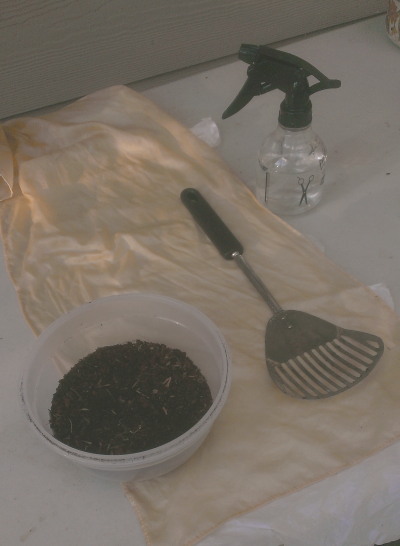
I scooped up a few handfuls of Phaeolus bits—as the fungus dries, it seems to shed its layer of pores, which have turned dark brown, but I reasoned these bits would still contain pigment.
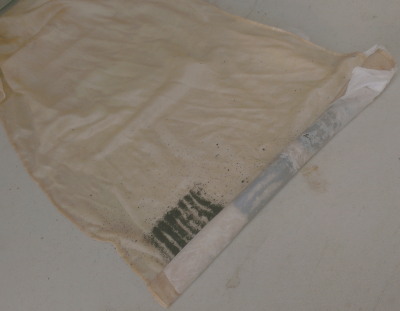
My stencil
My search for something handy to use as a “stencil” took me to the kitchen utensil drawer. My dearest, who does all the cooking, probably wouldn’t have condoned my taking this up to my studio to be covered in inedible fungus dust, but in matters of mushroom dyeing, it’s always safer to follow the “ask forgiveness” rule. I sprinkled the bits into the slots with a liberal hand, then gave the whole thing a good spritz of water to keep everything in place. With care, I lifted the slotted spoon off the fabric, pleased to see that the design had stayed in place. I soon discovered, though, that the mushroom bits had minds of their own and were scattering themselves outside the design area. So I went along and sprinkled bits over the scarf’s surface, hoping for a speckled background.
The first tryIt’s working!
I’d laid the scarf out on a long piece of plastic (cut from one of those ubiquitous shopping bags that I swear procreate under the kitchen sink) and began rolling, taking care not to disturb my designs.
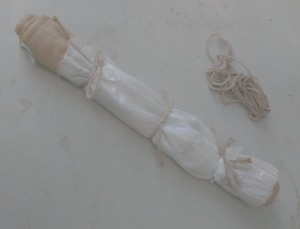
Rolling the bundle
Then it was a simple matter of tying the scarf tightly in three places . . .
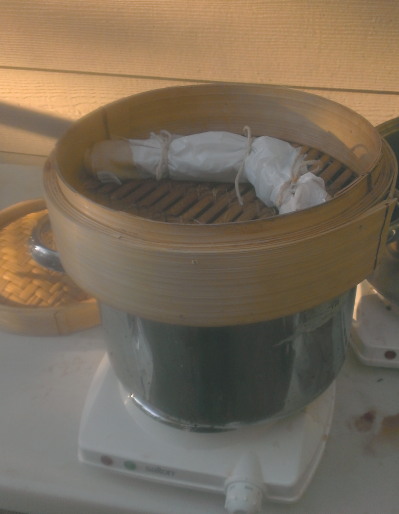
. . . and putting it into a bamboo steamer where it steamed for thirty minutes one day and thirty minutes the next. (I did that because of timing—ordinarily I would have steamed it for an hour the first time.)
I decided not to wait three weeks to see the results. I figured the bits of Phaeolus would impart their colour quickly and permanently . . .
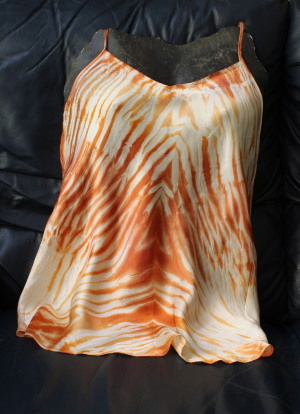
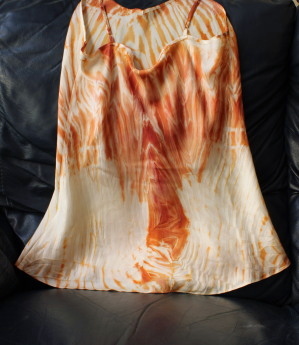
Even though last year’s harvest of Lobster mushrooms (Hypomyces lactifluorum) was bounteous beyond belief, I’ve been careful about using up all the parings. These wonderful fungi could decide to take a year off this autumn, as has happened in the past, and I don’t want to deplete my supply. Having had success with the Tiger Camisole, I decided to do something similar with the Lobsters.
Camisole in lobster, front
This was interesting: I’d wrapped and tied the silk piece around a stubby glass bottle, which I stood upright in the dyepot. Unbeknownst to me, the bottle had tipped over halfway through the process, leaving a half-dyed part exposed to the air—a happy accident indeed. The half-dyed bits were a brilliant orange, while the fabric that remained in the liquid dyed a deep red. I definitely need to play with this characteristic some more (assuming it will happen again).
Just recently I’ve noticed a lot of interest in mushroom dyeing in my community, so I’m excited about getting other people excited!
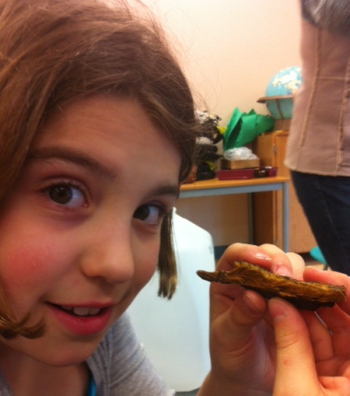
An art class of eight- and nine-year-old girls invited me to show them what it involves. Most of them had been told by their parents (as was I, many years ago) that you should never, ever touch a mushroom because it could kill you. I understand the fear behind that admonition, but we don’t tell our children to never, ever touch any leaves or wild berries, even though some of those can be pretty dangerous, too. We teach them not to eat anything in the wild without first knowing what it is, and that’s how it should be with mushrooms, as well.
The dried mushroom
So I put the class to work breaking up a good selection of dried Phaeolus schweinitzii and putting the pieces into fine lingerie bags—this polypore had acquired a bit of fuzzy fungus of its own, but that didn’t seem to affect the end colour.
Getting comfortable with mushrooms
And it wasn’t long before everyone was right into it.
Mordanted samples
We talked about mordants and how they work, and everyone prepared samples. I follow the practice of giving each sample a different number of knots, depending on its mordant. Traditionally, this was:
Although some dyers use chrome and tin, I prefer not to, so I couldn’t see myself tying four and five knots in my copper and iron samples when I didn’t have to. So I’ve devised my own easier system: No mordant: no knot; Alum: 1 knot; Iron: 2 knots; Copper: 3 knots. (The word iron has fewer letters than the word copper, my way of remembering the knots.)
Into the dyepot
The dyepots had been simmering while we got the samples ready, then everyone watched with interest as the samples went into the hot liquid, along with some pieces of wool batt. The anticipation built as the pots simmered and the classroom filled with the unmistakable odour of cooking mushrooms.
Mushroom colour!
At last, the wool was ready! I understand everyone went home with some good dinner-table stories, and in a few weeks we’ll get together again and use this wool to make little felted bowls.
Then the following week, a few members of the Sunshine Coast Spinners & Weavers Guild got together for the first of three mushroom workshops. We’re focusing on one mushroom per session, which gives everyone a chance to learn what to look for and where to find it, and we also have more opportunity to experiment with that mushroom. In this case, I wanted to see if we’d get much difference between well water and chlorinated water, so one of the members who’s on a city system brought a couple of containers of her water.
Phaeolus dye samples
Our samples were premordanted with alum, iron, and copper, and we also put some alum-mordanted samples in iron and copper afterbaths. Unfortunately, we didn’t get the bright gold of the children’s dyepot, but we did find that using chlorinated water made only a marginal difference in the colours. More images of that day can be found at the blog of the Sunshine Coast Fibreshed, a new affiliate of the larger Fibreshed movement promoting local fibres, local dyes, and local artisans. We’re excited to see how this is taking shape, and mushroom dyeing certainly fits within this idea.
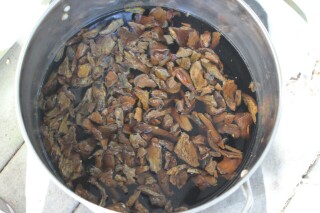
I was fortunate enough to obtain a quantity of these mushrooms (dried) from the amazing Alissa Allen (see mycopigments link at the side), who’d collected them in December around Arcata, California. I was swooning in anticipation, because these beauties are purported to give a violet colour, and they don’t grow this far north. So here they are, having soaked overnight in my well water, ready to be cooked up.
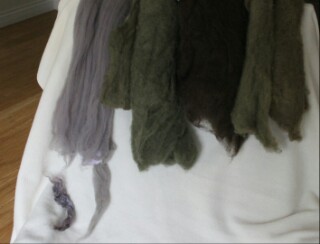
Here, then, the results, from left to right: First dyepot, unmordanted wool; first dyepot, mordanted with iron; second dyepot, mordanted with iron; third dyepot, mordanted with copper; fourth dyepot, mordanted with iron; fourth dyepot, mordanted with copper.
As an experiment, I took a bit of wool from the first violet sample and placed it in an ammonia solution (pH9) to see if that might bring out even more of the violet. To my dismay, the sample (seen at the left, under the first violet sample) quickly turned grey. A striking grey, but grey nonetheless. Next to that grey sample is a bit of synthetic “icicle” that picked up the violet colour without a problem.
Being unwilling to let go of this potential colour, I tried yet another exhaust with my little samples, but it was clear the pot had nothing more to give than an uninteresting beige, so I was forced to return what was left back to the forest.
This has been a very exciting dyepot, and I still have half ot the dried Omphalotus to play with again!
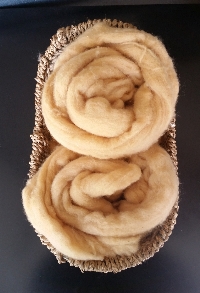
I had the good fortune to attend a spinning workshop by the amazing and inspiringJacey Boggs last summer, where she opened my eyes about the possibilities in handspun yarn. Here are some close-ups of a couple of the mushroom-dyed skeins I posted about a few days ago. The pink one, dyed with dermocybes (the darker shade was mordanted with iron), is spun with coils, while the green yarn, dyed with Hydnellum, is one thin strand plied with a thick-and-thin strand.
Now I have even more reason to fondle my handspun!
For a variety of reasons, some personal, some structural (as in setting up a studio, aka My New Happy Place), some environmental (as in this wasn’t a very good year for dye mushrooms), my dyepots have been cold for the last few months. That will soon change, however, once my new workspace is ready and functional.
My spinning wheel hasn’t slowed down all that much, though; here are some interesting textures that resulted from some of my play sessions.
More posts to follow as soon as I can fire up the dyepots!
My first mushroom dyepot of the season, using Tapinella atrotomentosa (Velvet Pax) yielded the colours on the left. I’d seen some nice purple from this mushroom on unmordanted wool, and that’s what I was hoping to get on the large (unmordanted) sample at the left; it turned out to be more brown than purple. The lighter sample to its right was the exhaust bath, while the lovely purple was a small piece mordanted with alum.
(Confession: I’ve begun putting my fibre inside a very fine mesh lingerie bag so I can extract colour and dye the fibre at the same time. When this batch began to heat up, I smelled the distinct odour of washing soda, leaving me to think I hadn’t rinsed the bag completely at the end of last year’s season. My next batch with this mushroom will get a pinch of washing soda to see how that affects the colour.)
Proceeding to another batch of fresh mushrooms (and a thoroughly rinsed mesh bag), I put a large piece of alum-mordanted wool into the dyepot, and instead of purple, I got this great olive green! The alum-treated silk scrunchy also went through that dyebath, while the sample on the far right was mordanted with copper.
I wonder if the phases of the moon, or the way I crinkle my eyebrows, has anything to do with the unpredictable results from this mushroom.
I believe all forest creatures, including myself, must learn to live together, but dammit! I’m not prepared to let the squirrels have my dye mushrooms when they already have plenty of forest food to munch on and store away at this time of year.
These little buttons were just starting out when I found them on top of a mossy stump early in August, so I set up a twiggy-branch protection system for them (see my August 13 post) and hoped for the best.
Velvet pax untouched
Sixteen days later, here’s what I found (after removing the twigs): beautiful, untouched specimens, fresh and perfect for the dyepot. And into the pot they went, that very same day. I’ll post pictures of the results soon.
CELEBRATING THE BEAUTY OF SUNSHINE COAST MUSHROOMS